Sunday, 10 April 2016

One Room Game Assignment (Model Sheets)

All-Stages
There is not much to talk about this stage as these are enlarged versions of the ones on the prop concept sheets just made for Alex to model from. The only thing different is the tap has a model sheet septate from the bath and sink, this is done so that Alex can model one pair of taps and then duplicate them to save time.

One Room Game Assignment (Prop Concepts)

All-Stages
After the characters the next stage was to design the props and furniture to populate the room, this varied from paintings to room colour schemes and large furniture like the table. For these concepts I followed the same concept for each one, by starting off with four silhouettes then once I chose one I then created a miniature model sheet. Which would be allowed to help me put the developed concept into the correct perspective. So with that done I made the developed concept with dull colours like grey's, white and a bit off black for the lighting and shadowing. Finally I began to add colour and textures which I placed on the concept sheet to use as a sample for the different colour variations. I then chose one as a final design. For the paintings of the safe and bathroom I just used the inspiration from different Art Deco paintings, which then lead me to try and create my own version for the game environment. Overall I am proud with these concepts as I have never done prop designs before, the only improvement is again trying to get the perspective right but I am improving slowly.

Thursday, 7 April 2016

One Room Game Assignment (Character Art)

Stage 1-Robert Wilson
After the initial concepts were done I was then asked to design our characters. I started off with the main character Robert Wilson. These concepts are just initial ones as the character will not be made or seen. This was done to give me and Alex an idea of what he might look like. I designed three options for the main character, each with an individual style. We decided to go with number 1 as he seemed more laid back and even relatable despite being in the 1930s.

Stage 2-Gloria Jones
For this character it was interesting to tackle as we had someone in mind to pose and play as the character. So I used our model to design off of to create three similar designs as her costume was already picked. Number 1 was the one based off her costume.

Stage 3-A.I. Concept
For the A.I. I created animation phonemes to use as a practice for an animation later on. These concepts have two purposes one to give an idea of the characters appearance and two to give our model an idea of the mouth shapes she would need to make.

Stage 4-A.I. Final
Then for the A.I.s final appearance I took photos of our models mouth as she shaped her mouth to match the concepts.

Stage 5-A.I. 2D Sprite

Finally I made a sprite sheet for animating in Unity. This method was easy to achieve as I have worked with 2D sprites before.

One Room Game Assignment (Initial Concepts)


Stage 1-Inspiration

Stage 2-Initial Concepts

After sorting out the documentation for the game, I began to work on some initial environment concept art. I began with a quick sketch and then began to develop the line work. Once I was happy I then started to paint under the line work to follow the image that inspired me to do the initial concepts like this. I am still learning how to do environments as I specialize in characters, but I am at a state of being happy with these concepts. The only thing that I would do to improve it would be to correct the perspective as it is slightly off, however the information is there to get the ideas across with my team mate.


Wednesday, 6 April 2016

One Room Game Assignment (Documents)

Stage 1-Mind Maps
This term we have been set the task to create a game of our choice in teams of 2-8 people. I teamed up with Alex Hall as I feel like we would work well together. For this project I would do the concept art and GUI plus any bits extra and Alex would do the modelling, texturing and coding. To start off we developed 3 mind maps which would give us a clear idea of our initial ideas, We wanted to create a simple but visually stunning game. So we decided to choose to make a game based on the 'One Room' mind map.

Stage 2-Mood Boards

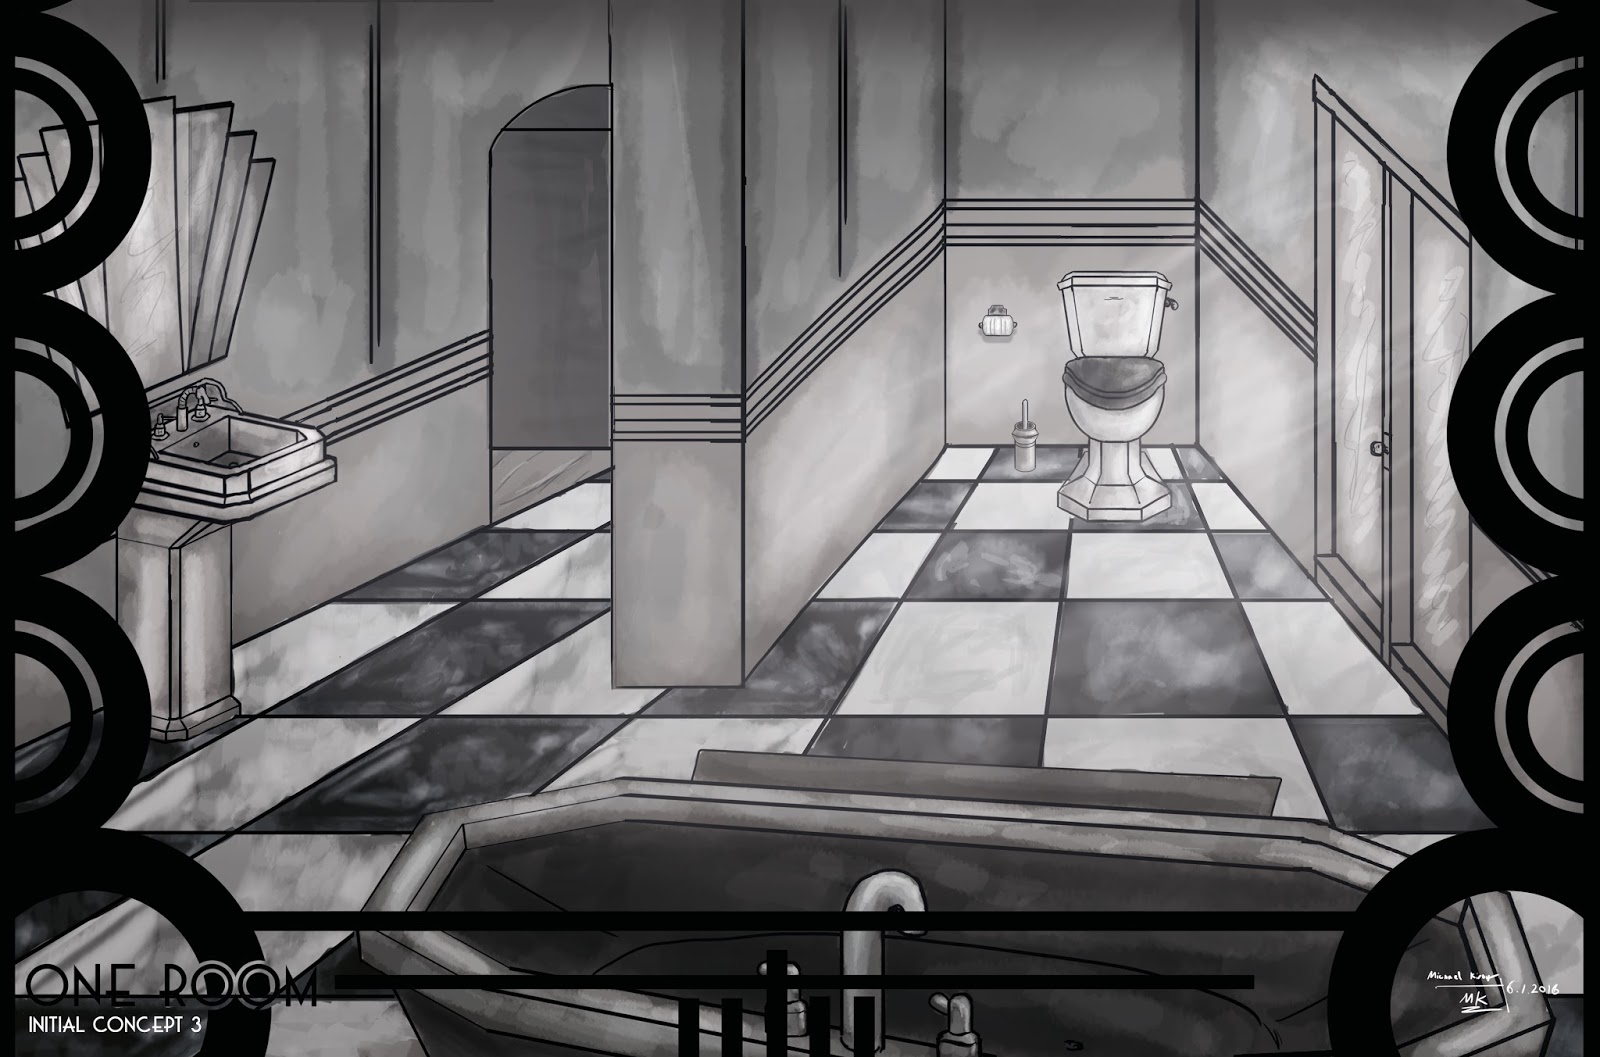
After the decision we moved on to develop mood boards to reference from. The top one is a mix of the Art Deco and artistic style we wanted. The middle one was for an idea of the wallpaper and flooring which would want to use as a guide line for concepts and texturing. Finally the bottom one was for the main characters clothing which would be used for later concepts.

Stage 3-Maps
After the mood boards I began to make a simple birds eye view of three maps of different rooms, one was of a living room while other two were bedrooms. One bedroom had a on suit while the other had a study. In a team meeting we decided to go with the bed room with the on suit.

Stage 4-Story Board
In this stage I made a story board of how the game would work. The idea we had was for the player to find assets with  numbers on, which when the player collected them all it would allow them to open the safe and get the key to escape. To add a challenge to this the main antagonist called A.I. has drugged the player and after a certain amount of time the player would pass out, and have to restart.

Stage 5-Paper Prototype
For a presentation we designed a paper prototype which we would be used to show our idea in a class as a working design.
Stage 6-Colour Palette
The final thing to was put a colour palette together so we could work towards a certain colour scheme. From red to cream those colurs are the base for the room colours, while the colours such as blue and green are for the odd thing around the game. The colours of grey, black and white will be used for inventory or menu deigns.


Hair Alpha Project

Stage 1-Reference
Before attempting to do the alphas on the final hair, I started off by practicing how to make customs alphas. I used the image above to texture the custom alphas.


Stage 2-Alphas
To start off I used custom hair brushes on Photoshop to draw out the practice strand. Once I was happy with it I then selected the hair texture and placed it over the strand, I then right clicked over the texture layer and scrolled to the Clipping Mask which masked it over the strand. I then used eyedropper to select the basic colour and filled in the background. Next I saved two files as Targa one was of the black strand on the white background and the other was of the textured strand with a coloured background. I opened a copy of the black and white strand on the an pressed Ctrl I to invert the alpha and then I copied and pasted the colour alpha on top. The next stage was to copy and paste the inverted alpha in a new channel layer which created the final alpha.


Stage 3-Hair in Maya
This is the final stage to apply the alpha on to the hair model. I first imported the hair model as an Obj file, then I created a new material called Lambert. Then I uploaded the final alpha as a file, once that was done I went to Hypershade and dragged the Lambert material onto the model. After that all that's left to do is make sure the UVs are planned out for the alpha to work but I am confident to do this for my final model.