Wednesday, 9 December 2015

Triple A Asset Assignment

Stage 1-Mood Board
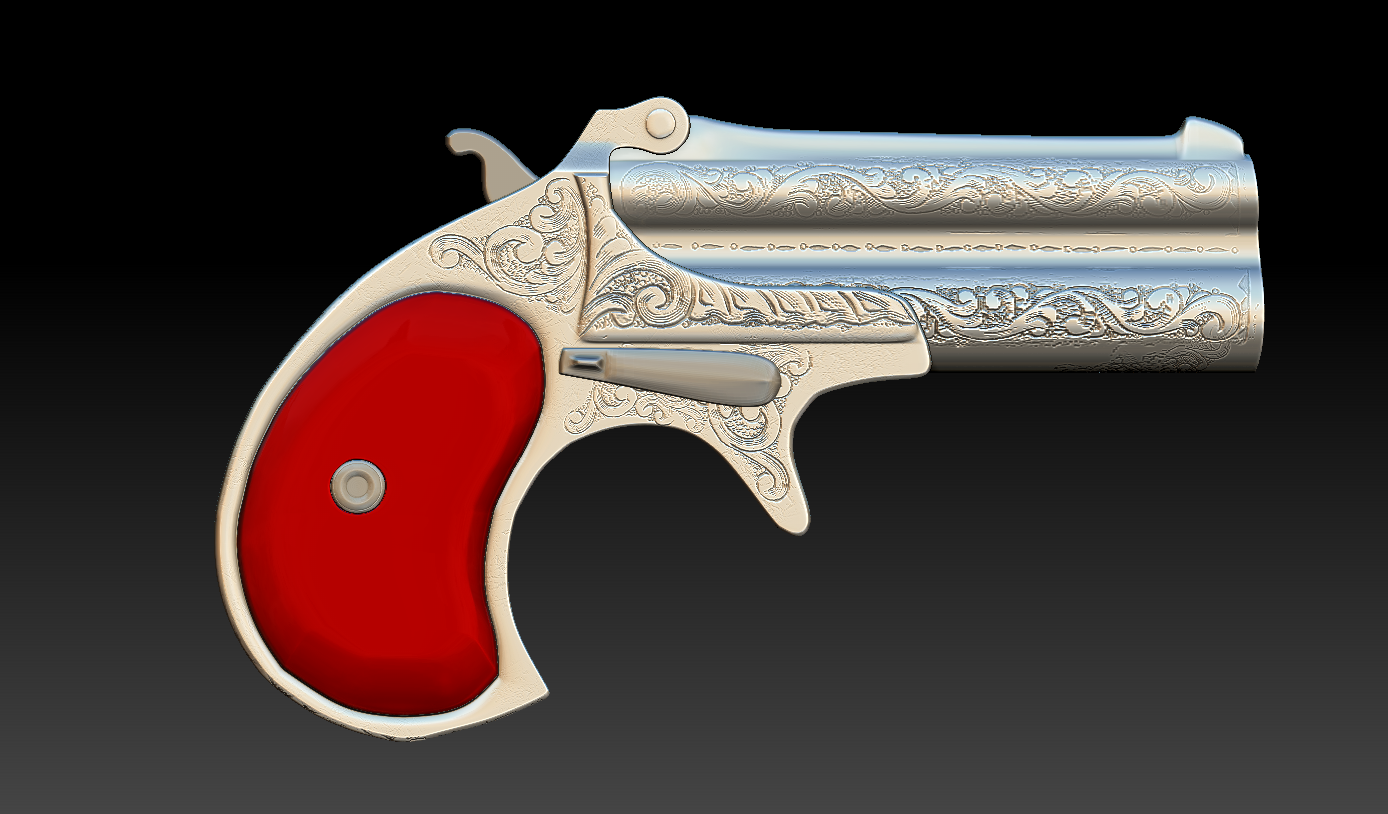
For this project we had to choose an object to recreate as a high res asset, which could be used in a triple A game. As seen above I gather images of my chosen object and organized it into a mood board. From here I could start to model from my chosen reference image. The reason behind my chose is because out off all the antic objects I found this gun caught my eye; because of it's elegant structure with the well designed engraved pattern on the side. Plus its beautiful pearl textured handle.

Stage 2-High Polygon Model
Then I started to develop my high poly model and create a detailed version of my chosen object in Maya 2016. As I model this I begin to establish which parts would be moveable or should be individual pieces such as the gun's barrel. After completing the modeling I then smooth out each piece ready for ZBrush.

Stage 3-Into ZBrush
After completing my high poly model I then exported each of the individual parts as OBJ file and then I imported each part into ZBrush. Which lead me to use the Sub Tool to have all parts in one place, I did have to use the move tool to a line or place certain objects into their correct places. After that I was able to use some alphas that I made in Photoshp to give my gun its engraved quality as well as its screws depth. I then poly painted the handles grip so when I later bake and add textures onto my model the peal texture can be kept on the area marked red, so far I am happy with its outcome.

Stage 4-Low Polygon Model
After completing my asset in ZBrush I then moved on to reproducing the asset as a low polygon model. So that later on I could bake on my details made in ZBrush to the low poly model. It was quite hard to recreate my model again but in low poly, however I defiantly managed to achieve it.

Stage 5-UV Unwrapping
Soon after I made my low polygon model I then UV unwrapped it which would prevent textures being stretched and to keep them place in the right place. This area was quite difficult and a bit fiddly, even with the new tools in Maya 16. But I was able to unwrap the UV map within a neat layout.

Stage 6-xNormal
Then I moved on to xNormal which is a tool software to bake details from my high poly model to my low poly model. I needed to bake three different maps the first one was a normal map then a  colour map and finally a cavity map.

Stage 7-Quixel DDO
With the maps baked and saved I moved on to Quixel, an add on software to Photoshop, which can  add the maps to a render form of my model as well as attaching materials and textures.

Stage 8-Quixel 3DO
The following screenshots are of my model which is fully rendered in Quixel 3DO. This allows me to see what it would look like and to also see how some effects might affect it such as lights, shadows and lines filters. There were also options to allow me to mess with the contrast and saturation as well as other adjustment affects. When I was happy with the way it looked I then exported the maps and model from Quixel into a folder for the final stage.

Stage 9-Unreal 4
Finally I once I was down in Quixel, I then moved on to Unreal 4 for my final rendered submission. I achieved this by importing my exported model and maps into Unreal 4. Then I made a new material which with a material window I was able to link my exported map such as the normal map, albedo map and the reflection map. Then I applied the changes to the material and then placed the new material on the model. Once I was happy with its position in the world, I moved on to building a scene to see the effect it would have on my gun. After that I then clicked build so it would build the correct lighting for the scene and my triple A asset. After this I saved the scene and made a build of my level for submission. Overall the process was interesting  but I enjoyed the new skills I learnt as well as the final outcome of my model.

Saturday, 5 December 2015

Point and Click Assignment


Stage 1-Mood Boards
Like all my work before I start off with a mood board of image research, but in this case I had two one for low poly characters or stylized characters and the other for World War 1 German army uniform.

Stage 2-Draft One Sheet
 During the research I made a draft one sheet to cover a few key details as well as the ideas we had. The art work was provided by my other teams Naomi and John.

Stage 3-Character Sheet
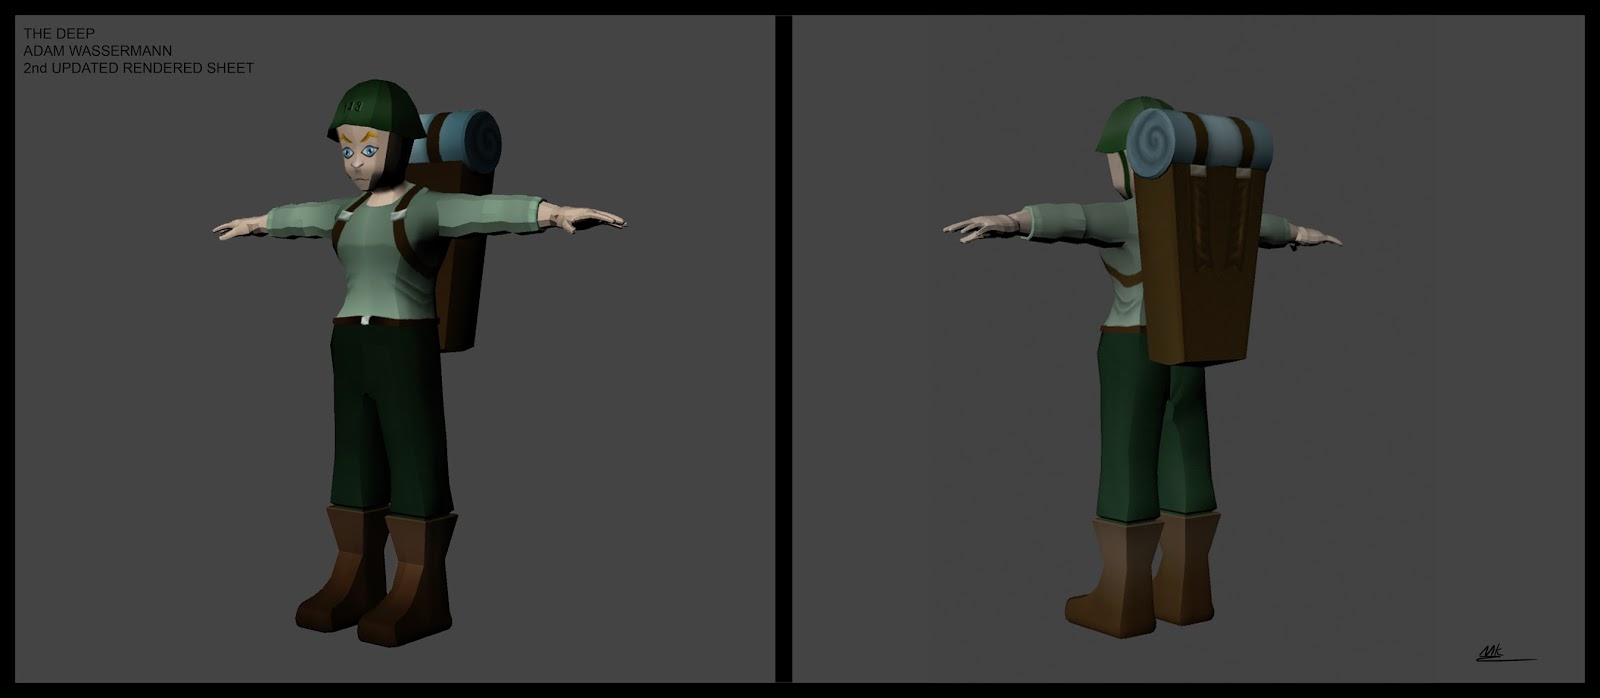
Once I had a few initial designs of the character done by our concept artist I designed a draft character sheet. At first we were pleased with the character but as time went we all agreed he looked too toy like, so we moved on to make him slimmer and stylized. Which lead me to finally design a final character sheet for me to model from.

Stage 4-Character Model
Soon after I modeled up the low polygon character which was based on my final character sheet. At first modelling it was easy until I got to the UV unwrapping which proved challenging as it was an area I struggled with before. However with help from one of my team mates I was able to find a simple and more effective way of dealing with UV unwrapping.

Stage 5-Painted Textures
Once the character was done and unwrapped it was just a case of adding textures. The textures above are ones that I painted in Photoshop with different brushes and filter to create the detail I wanted.

Stage 6-First Textured Character Model
After I painted the textures I then went on to take a snap of the unwrapped UV mesh map to add my textures and apply some detail such as folds in the cloths or belt buckles which was done in Photoshop. Then I saved the UV textured map as BMP file so I could apply it to my model, the outcome was a success at first.

Stage 7-Second Textured Character Model
However the characters textures didn't much the environment textures so as result I went back and changed my textures from a realistic look to a more stylized look like "Dungeon Defenders 2". After this the character was ready for rigging and animating.
Stage 9-Third Textured Character Model
As a last minute thing I decided to add a bit more detail to the character's second texture. Which add a bit more depth in the character's body but obviously not tiny detail as the camera is a certain distance away and it would be pointless and unappreciated.

Stage 8-Rigging and Animation
Finally after texturing, UV unwrapping and modelling, I then moved on to the rigging and animating, which was a whole new experience for me. To rig the character I used HmanIK a rigging system in Maya, the hardest part was rigging the character, because of many different issues I came across such as a lining all the joints and painting on the weights. But once I was able to overcome the problem I could then move on to adding the animation to the character so he could walk through out the environment. Due to limited time I was not able to create a walking animation but was able to use an imported animation from the Unity Asset Store to give the movement I needed.

Stage 9-U-Boat Soldier Textured Character Model
Like the main character above I went through a similar process for the U-Boat Soldier. However this character or characters would not be rigged or animated.

Stage 10-Creature Sketches
These are sketches and developed silhouettes for some shadow creatures which would have been enemies if the game went beyond the demo process we are doing at this time.

Stage 11-GUI Icon Art


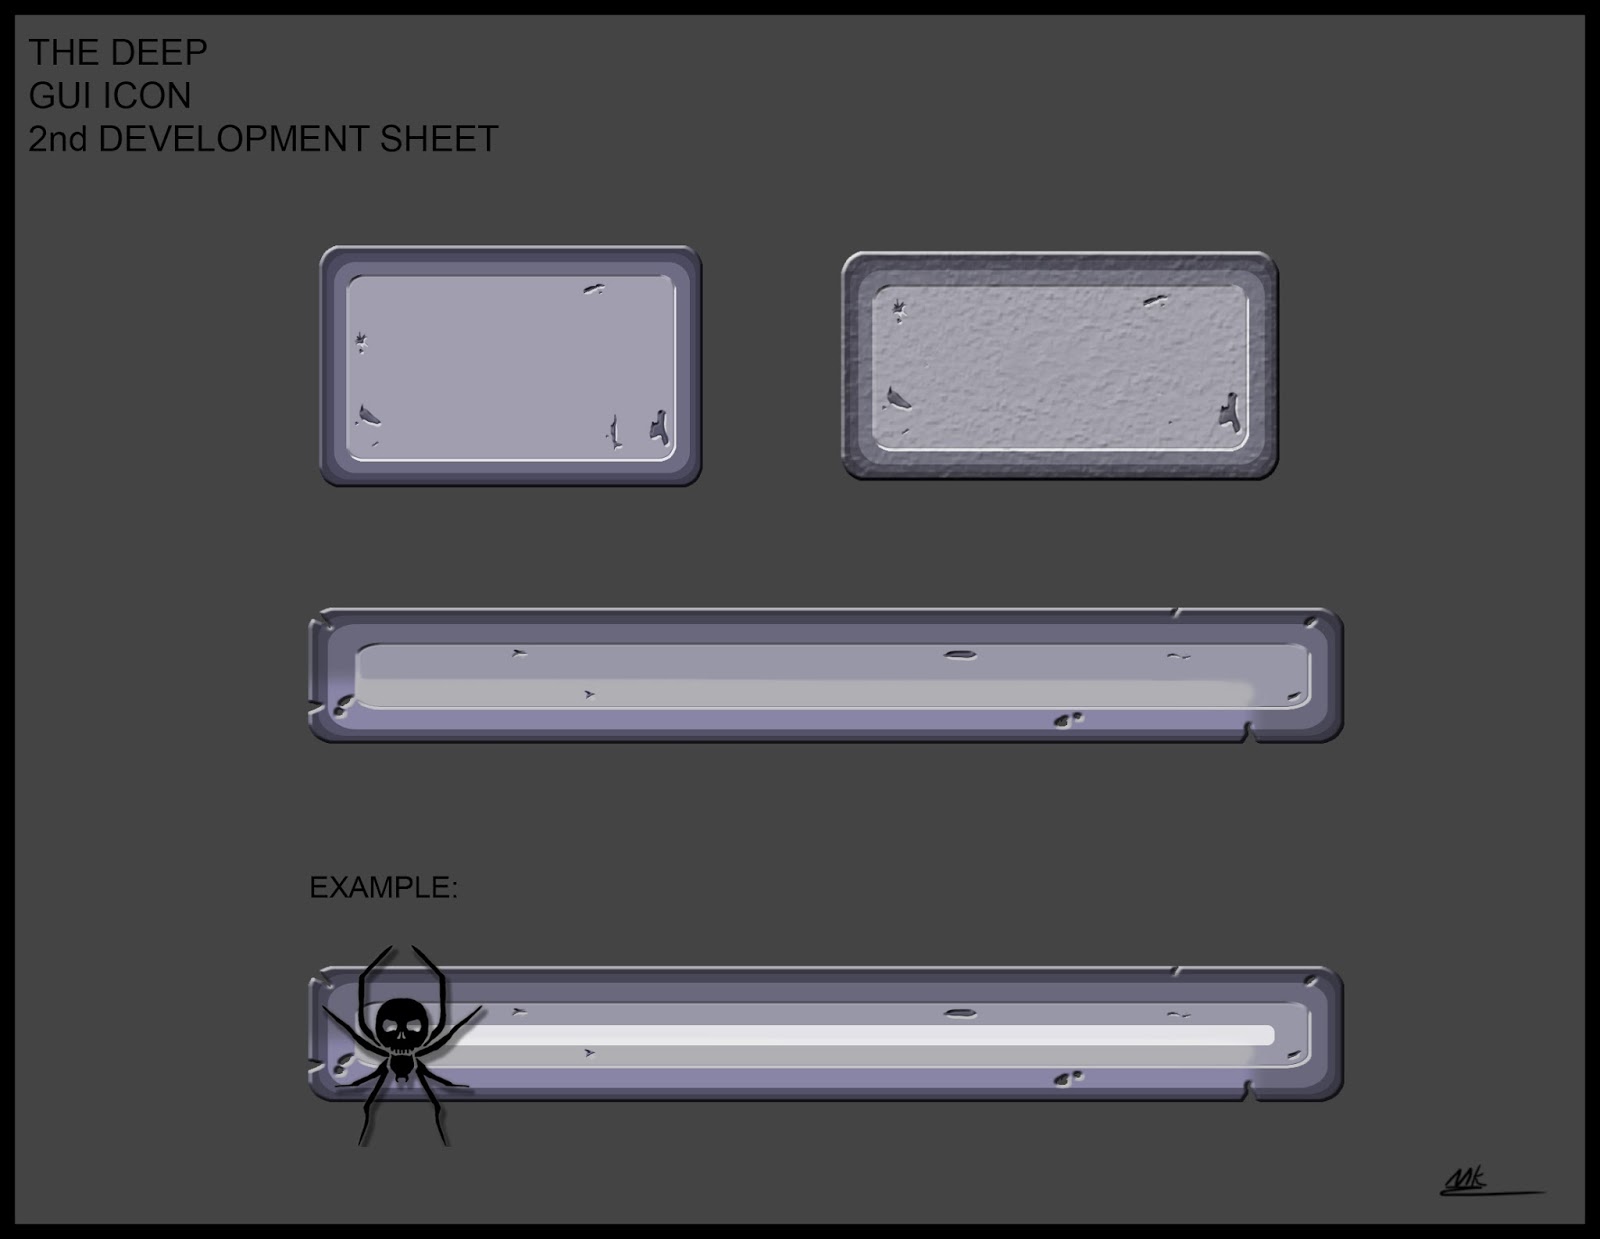
For something extra I designed some GUI icons such as a fear icon, pick up rock icon, crystal torch icon and a power crystal icon. As well as some a fear bar and menu and in game text boxes. The final fear icon which is the spider with skull body was finalized by my team member Alex.

Stage 12-Concept Art
This is a concept I did in my spare time but I liked it so much that I decided to put it forward for a environment concept art piece.

Stage 13-Draft Main Menu Design
Later on I decided to use my earlier environment concept piece for the background and idea for a main menu which we would need for our game. My team liked the idea and 3D version is being worked on for the game by the environment artist.

Stage 14-Logo
I designed a team logo for the team which we could use for our team blog, box art and intro into the game. Overall I am happy with the work I produced it has been a tough project, but the outcome was really worth it and I have come away with a few new skills and techniques that I can apply to later projects.

Stage 15-Statue Texture
To finish off my work on this project, I helped out my fellow team mates by making a statue using the base model of Adam Wassermann, and then I made a rock texture to use on it.

Stage 15-Statue Textured Model

Lastly when I was applying the textures I discovered I made a skull pattern with in the model. Which I then copied and pasted on to the statues head. As time was running short and we had no time to make a detailed version from the concepts but I feel like it adds to the ambient horror we are looking for.

Friday, 20 November 2015

Olivia Persnal Project

Stage 1-Outline
This is a personal project that I started working on to help me get back into digital painting. For this it just started off being a simple sketching process which lead me to a good out come that I was proud of.

Stage 2-Base Colour
After sketching I moved on to add base colour for the character and then move the base colour layer above the sketch.

Stage 3-Layer Painting
Now I could add some layers of painting to help bring out the characters structure and depth in both the hair and body.

Stage 4-Background and Editing
After painting on several layers I then moved on to adding a background in the window to show the sign of a world beyond. I then also altered the characters colours and brightness.

Stage 5-Adding Detail
Then I started adding detail in her body which became her clothes, as well as adding depth and shine to the window, this process is quit quick.

Stage 6-Adding Textures
To add the textures in the clothes I made some custom textures in Photoshop which I then applied to the character's body I as morphed it to fit and flow with the body. 

Stage 7-Adjustments
Soon after I completed adding the textures I then began to use some adjustment settings to help give the character some warmth and contrast. I used a mixture of  Levels, Brightness/Contrast, Hue/Saturation and Channel Mixer. to help give me the effect I wanted and once I was happy with the outcome I then merged it down on to the layer of the character, so it would not effect the window or background.

Stage 8-Final Details
Before finishing off the character I then started to clean up any areas that were mistakes or adding some last minute details, like one of the feet. It was too low down so I used the lasso tool to select it and movie it up and then the clone tool to make bend with the rest of the leg.

Stage 9-Shadowing and Lighting
Finally I decided to add some more light with the doge tool and add a shadow. The shadow is quite easy I simply copied the character and dropped its brightness values all the way down till it was black, I then pulled the silhouette down and dropped its opacity. Once I was happy I then put the shadow layer behind the character to show the shadow coming from her. Overall I am really proud of the outcome and hopefully doing more work like this will help me improve.

Thursday, 5 November 2015

3D Sig Personal Project

All Stages-ZBrush Video
After my Zbrush session learning Dynamesh and IMM, I started to practice my skills by making a 3D model of Sig. A character from one of my projects I did last year about a small Dumbo Octopus. The video above shows my process which I went through this was a mixture of different things that I have learnt in ZBrush this term.

Tuesday, 3 November 2015

Combat Knife Project

Stage 1-Combat Knife Reference
For our first session back with Maya we are shown how to use Quad Draw and Multi Cut to help create a base for a High Res Combat Knife that I will hopefully be able to model. We used the shader to attach a reference image to a plane so we could create use it to begin the base of the model.

Stage 2-Base of  the Model
Now that the reference image was in place I could move on to using Quad Draw and Multi Cut to create the base model. Once I was finished using Quad Draw and Multi Cut I then used Extrude to move up the flat model to a 3D structure. Once this was done I then moved on to adding a inner raised level to create a grip for the knife handle as well as adding holes for the nails. Finally to finish the handle off I added a bevel to the edges of the grip and handle to help smooth it off.

Stage 3-Rest of the Model
When I was done with the handle I moved on to the actual blade of the knife and used the same technique as above but keeping the handle and blade as two separate objects. This part I did struggle with at first but once I understood the error it was quite easy to correct.