Thursday 26 March 2015

Character Modeling Assignment

Step 1-Reference Images 
For this Maya Assignment we had to model a character called Finn using the techniques we had learnt before.

Step 2-Box Modeling 
First I started to box model the feet and work my way up by shaping and adding edge loops needed for the model's structure. As I reached the waist I had to create an arch to form the legs then I extruded up to the chest and back. Then I extruded the arms until I got to the hands which were quite difficult to do. Finally I reached the head another part of the body I found difficult but managed to do.

Step 3-UVs
After I modeled the character I then moved on to the cutting and unfolding of the UVs which would help me texture the character later on.

Step 4-Texturing
Finally when the UVs were unfolded I saved the UVs using UV Snap Shot to which I would load in Photoshop to add the textures and Colours on to the model.

Sunday 22 March 2015

2D Game Demo Assignment

Pre-Production
1. Mood Board
For our first Spring Assignment we had to build and code a demo of a flying or swimming game set in 2D or 3D, we were had to also sot out teams and within those teams assign roles. I became the level designer for this project. As with all my projects I started off with a mood board to give me an idea of what the game environment could look like. From this I was able to chose an idea.

2. One Sheet
After the mood board I moved on to write up a one sheet of the game, with this one sheet me and my fellow team mates could understand the story, locations and characters in the game even give details of who it might be aimed at as a target audience.


3. Level Plan
Then I began to sketch out some ideas and then using pixel art I would design the Sprites that would be used in our game environment.
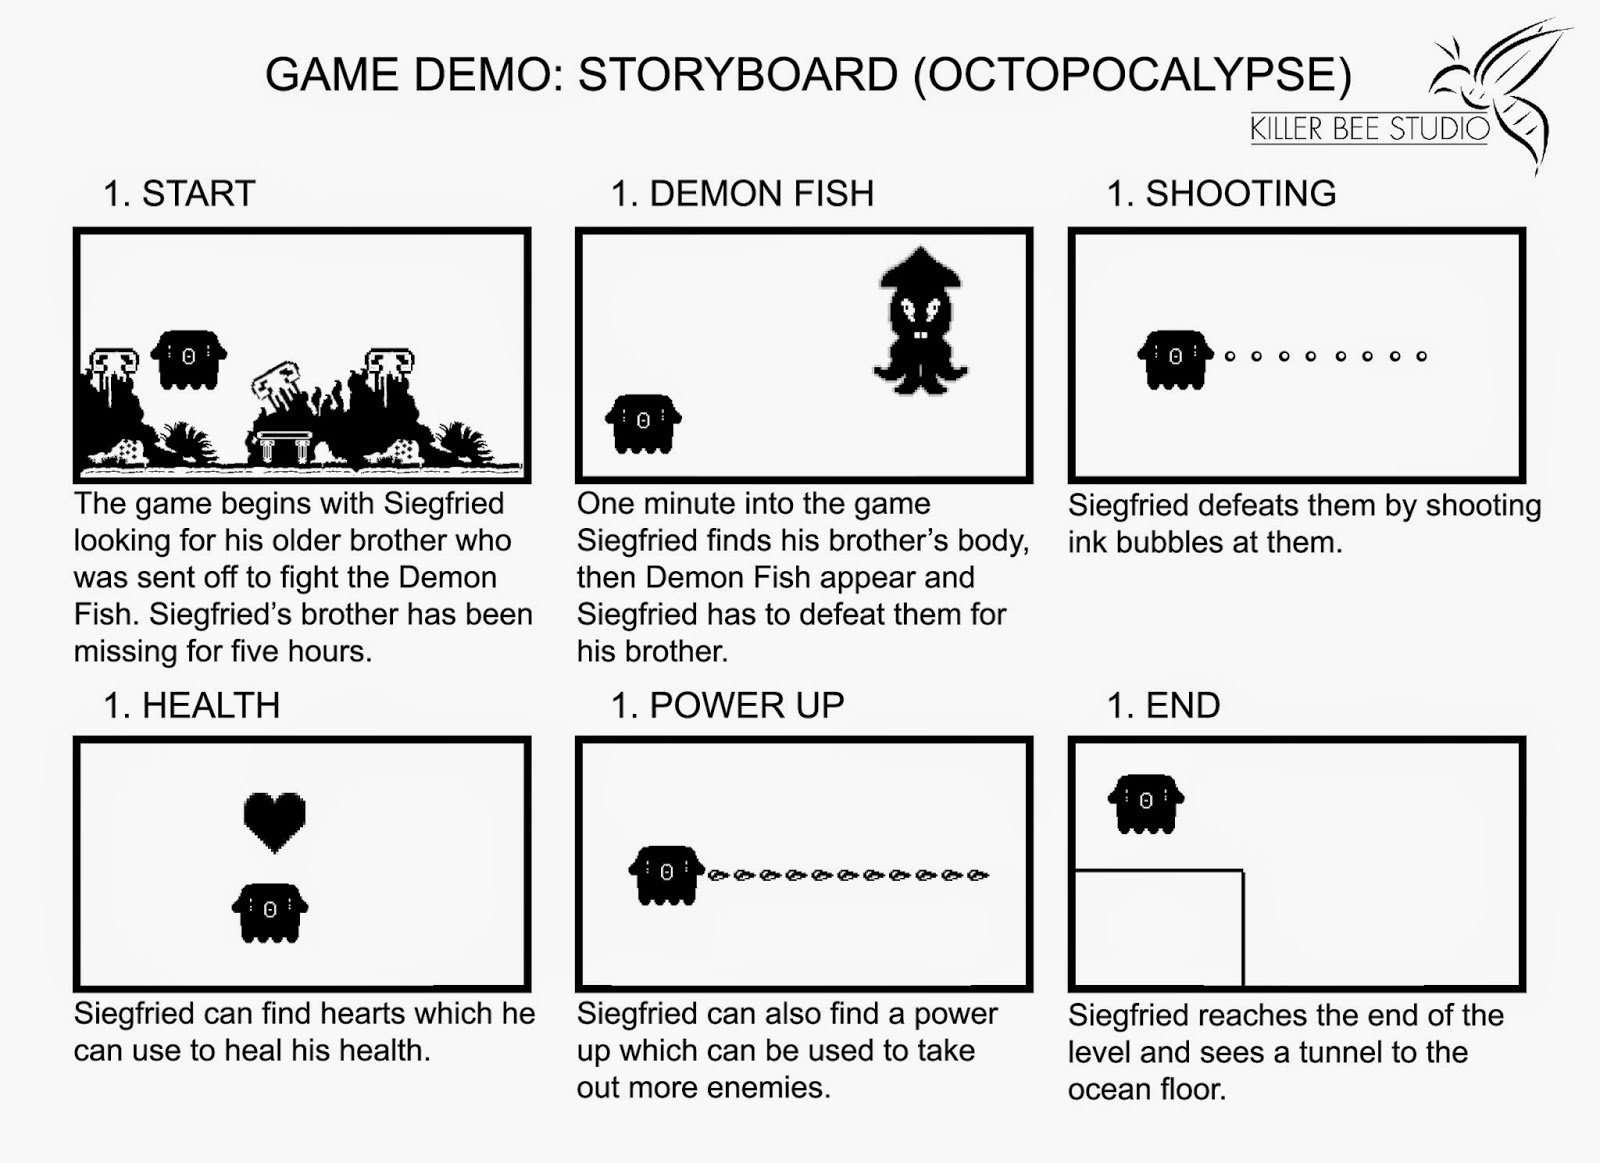
4. Storyboard
After the level plan was made I moved on to a quick storyboard about the game demo and what would take place in the demo.

5. Poster Art
For fun I made a poster for our game which I might use as the main menu background.

6. Sprite Sheets
This is a Sprite Sheet of  one of the enemies. A Sprite Sheet is used to animate sprites in the game, the technique is still new to me but hopefully it will come together really well.

Alpha
In the Alpha stage I was able to assemble a few scripts which meant the player could move around and also it would allow the camera to follow the player (in this case the place holder) around the level. I also placed some colliders which made the level more interactive.

Beta
In the Alpha stage I began to add enemies, animation and other key items for the game. At this stage their are still some bugs to fix but that is to be expected at this stage. Soon the level will be ready for the Gold stage which will lead to is build.

Main Menu
In the Alpha stage I also began to work on a Main Menu screen to start the game off it works really well, when you press the start game button it then heads to the level.

Gold
Finally in the Gold stage the game demo is ready and all bugs or errors are fixed and game runs smoothly. This has been an interesting assignment  and has given me the experience of a rough work flow to make a game.

Chosen Life Drawings From Sessions 8-16

Charcoal Drawings


Chalk & Charcoal Drawings

Pencil Drawings


Black Marker Pen Drawings

Coloured Pens Drawings


Monday 16 March 2015

Anthropomorphic Character Project

Step 1-Mood Board
For this Project we have to create an anthropomorphic character from the inspiration of Frogs or Toads. As usual I have started off be researching with a mood board of things that could inspire me.

Step 2-Rough Sketches
From the mood board I then move on to rough sketches which will give me an idea of what the character's position should be.

Step 3-Silhouette
Then from those rough sketches I chose three to make into silhouettes. These silhouettes can give me a clear idea of what its structure could be like.

Step 5-Final Outcome
Finally after choosing a silhouette I moved on to the final stage of my Frog character, which involved digitally painting and adding shading and lighting. This was a very effective way of working and has brought a good final result.

Friday 6 March 2015

Modeling T-Rex Project

 Maya Shaping
Over the last couple of weeks we have been learning how to model a character from a sketch to a low polygon model in Maya. We were shown more tools to help shape the model around the sketch after we did that we then moved on to unfolding UVs so it would make it easier to paint on the surface of the model. 

Finished Model in Maya

Texturing Project

Texturing
In today's session we learnt how to texture in Photoshop and how to export and import the textures on to the UV layouts so they could show up on the Maya model's surfaces and objects.