Sunday, 31 January 2016

Maya Hand Project

Stage 1-Reference
As I have mentioned before this term we are allowed to specialize in a topic of our chose. I have chosen to do a 3D character. After the head the next step was to learn how to model a hand by using the reference images provided to use.

Stage 2-Hand
After setting up the reference images I then moved on to the modeling of the hand, which I started of with a cube and then I began to shape it around the reference images. The key part about this is to follow the shape of the hand on the reference.

Stage 3-Fingers and Thumb
Once I got the base of the hand done, then I moved on to model the fingers. To start off the finger is made from a cylinder and then shaped and modelled based on the finger, once I was happy with its shape. I then duplicated to four times and re shaped and re sized them slightly to fit the other positions of the thumb and fingers.

Stage 4-Webbing and Welding
Once the thumb was attached by its vertexes, I then altered some of the outer vertexes to make the webbing between the thumb and index finger. After that I then moved on to the welding part which would attach the merge the vertexes of the fingers and hand. I did each finger separately, to weld the vertexes together I used the target weld tool. After the welding part I then moved back to webbing stage of moving some of the fingers vertexes, to make their webbing.

Stage 5-Shaping
Finally after the hand is complete, I then started to change and shape parts of it to form some features like the knuckles. This was overall a good outcome and I am really proud of the way it looks, again some changes might need to be made especially when it will come to adding it to the body. Which I look forward to having a go.

Wednesday, 20 January 2016

Maya Head Project

Stage 1-Reference
This term we are allowed to specialize in a topic of our choosing. I have chosen to do a 3D character for a AAA game. To help me get started we were set a project to model a head following the guide line on the the reference images.

Stage 2-Mouth and Eyes
To start off I began from the mouth and eyes, this was an easy start using the extrude edge tool to add the plains over the features. To shape and move them I used a mixture of the edge and vertex tools. The model is kept on X-Ray mode so I can see through the model to the deference image.

Stage 3-Face
Once I was finished with the mouth and eyes, I was then able to edge extrude several times and use the edge and vertex tools to shape and move the plains. this would allow me to form the face. The most difficult part of the face was probably the nose but once I got the basic shape it was then easy to complete.

Stage 4-Head and Neck
The head and neck was the hardest part as it required me to flick between the different view ports to help me get the shape correct. However the work flow was still the same, using the edge extrude tool and edge and vertex tools.

Stage 5-Ear
Finally the ear, which was and is still the hardest part for me as most tutorials seem to make a base ear like I have done, but I will have to keep checking and adapting it to see it goes with the rest of the head. The ear was made by using a cylinder and using vertex tool to move and manipulate it. Overall so far it looks really good, but some changes might have to be made at a later date.

Stage 6-Ear Detail
After a bit of thought I decided to teach myself how to make a more detailed version of the ear. Using the same techniques as for the rest of the head, I have successfully modelled a detailed ear, which as a result I am more proud of .

Thursday, 7 January 2016

Character Photo Manipulation Project

Stage 1-Anatomy

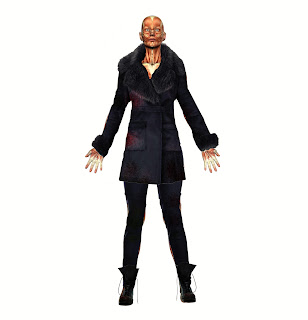
In the lesson today we were shown how to use a new way of making a quick reference sheet for a character with photo manipulation. First off we had to get some sort of human anatomy, I chose a female mussel anatomy.

Stage 2-Outfit
After I chose the anatomy I then added clothes that I wanted and manipulated them to fit her body shape. At this point I had an idea for a dirty apocalyptic world which would mean her clothes would look old with the colour toned down. I also added blood and mud marks to show she has had a rough life.

Stage 3-Head and Hands
Once I was finished with adding and altering her clothes I then started to add hands and a head to complete her. This was a bit tricky to get her hair to go well with the rest of her but it was a good to practice the clone tool which would allow me to copy and draw her hair in certain places.

Stage 4-Background
Filially to finish off I added a background so the character could be in the world I imagined for her to live in. This is a quick and easy process to achieve especially for quick results.